In the Apple Home app, you can enable notifications for some accessories, but the options are quite limited. With Controller for HomeKit, it’s possible to send custom notifications in automations. In this post, we’ll explain how this works and what you need to keep in mind.
Apple Home vs. Controller for HomeKit
When you open the accessory settings in the Apple Home app, you’ll see an option called “Status and Notifications” for some accessories. Here, you can enable notifications and restrict them based on time or the presence or absence of people. Afterward, you’ll receive notifications for every status change if the criteria are met.
While this can be useful for accessories like contact sensors, where receiving a notification when there’s a status change and no one is present makes sense, you often wish for more customization options and the ability to send your own notifications in automations.
This is exactly where Controller for HomeKit comes in. You can send notifications in real-time, with a delay, or at a specific time. Furthermore, you can set notifications to be sent only after a certain number of events have occurred, such as when motion has been detected twice within 10 minutes.
Another advantage is that you can specify which devices should receive the notifications when creating them. In Apple Home, you have to enable notifications individually on each device.
Notifications in Apple Home
Notifications can be enabled for some Apple Home and Matter accessories in the Apple Home app, including sensors, cameras, door locks, alarms, and more. Once enabled, these notifications are sent when there is a status change, such as motion detection, door unlocking, or alarm disarming.
To achieve this, you need to open the accessory settings and select “Status and Notifications.” From there, you can enable notifications and also limit them based on time or user presence.

Notifications in Controller for HomeKit
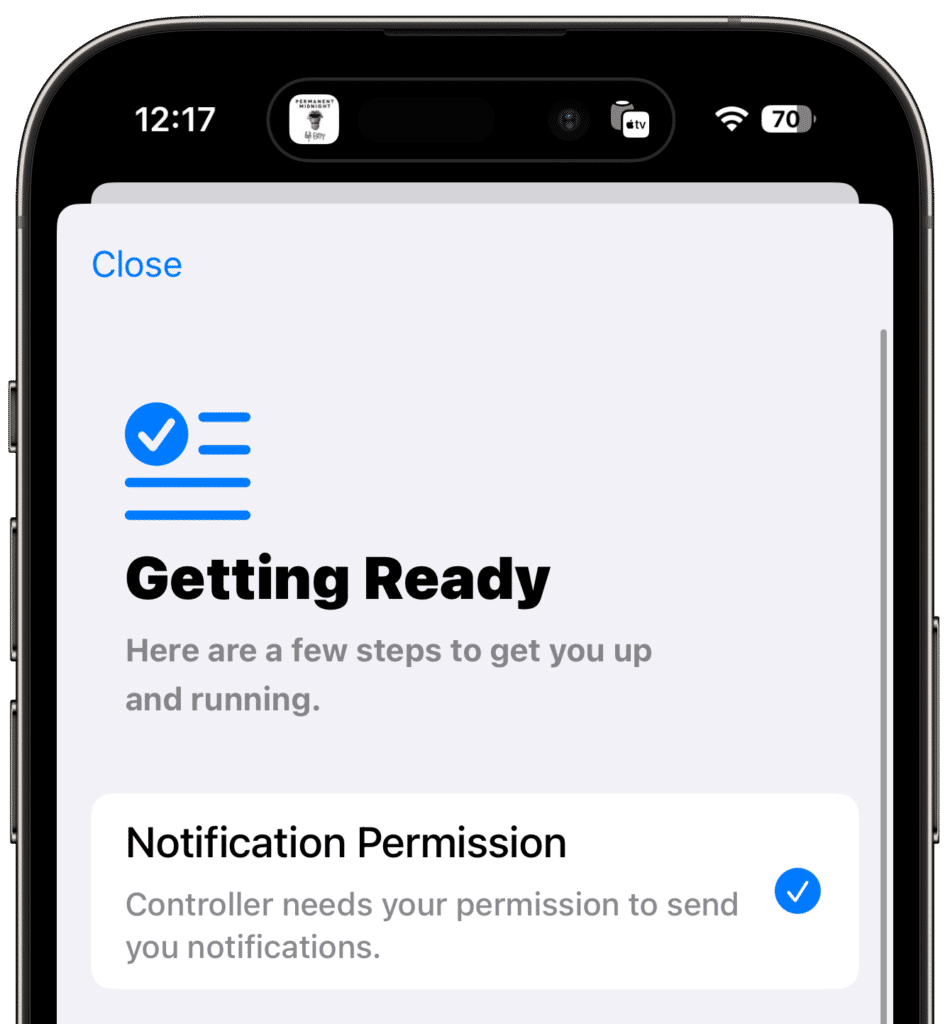
In Controller for HomeKit, you can define your own notifications and have numerous options to customize them according to your needs. When you first open notifications in the app, you will be guided through the setup process. This involves granting the app permission to send notifications and assigning a name to the device. Afterward, you will see some examples, and you can create your first notification.
Creating Custom Notifications
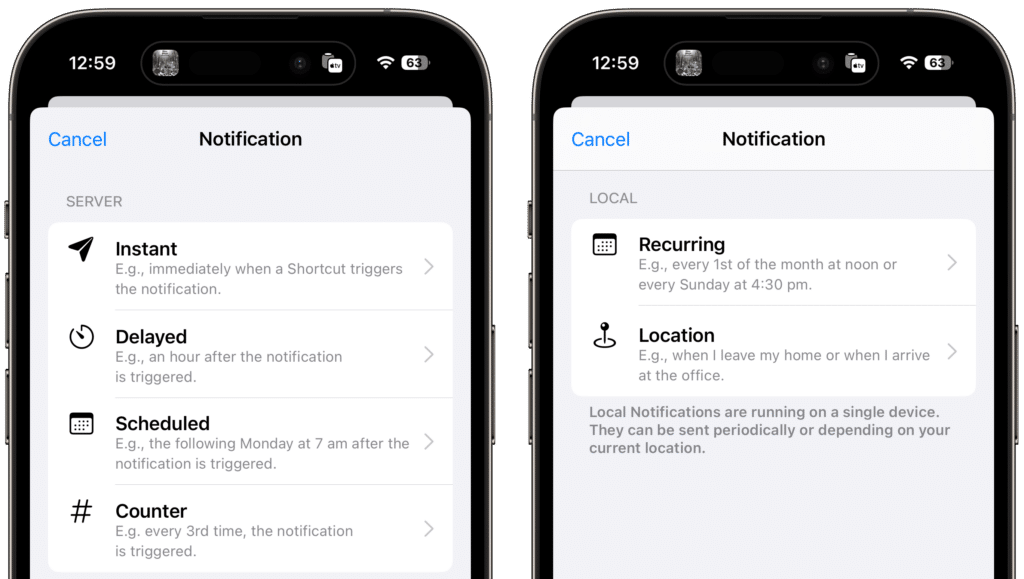
You can create a notification by tapping the plus sign in the upper-right corner. Controller for HomeKit generally distinguishes between two types of notifications: server notifications, which can be triggered via a URL, and local notifications, which are sent at defined intervals or based on location on the same device.
Types of Notifications
For server notifications, Controller for HomeKit distinguishes between four types:
- Instant: The notification is sent immediately when the URL is called.
Example: Humidity in the bathroom is high, and the window is closed. - Delayed: The notification is sent after a customizable delay. There are also two URLs available for scheduling and canceling the notification.
Example: The window has been open for 30 minutes. - Scheduled: In this case, the notification is sent at a specific time after triggering. Two URLs are available for scheduling and canceling notifications.
Example: The lawn was watered last night. - Counter: With a counter, the notification is sent only when the URL has been called X times. Two URLs are available for increasing or resetting the counter.
Example: The candy drawer was opened for the third time today.
On the other hand, there are two types of local notifications:
- Recurring: In this case, the notification is sent at a definable interval.
Example: A new month begins. Create a backup now! - Location: This type of notification is sent when you arrive at or leave a location.
Example: Welcome to the office! Remember to start the time tracking!
Available Settings
Once you have chosen a notification type, there are various settings available.
Title
The title of the notification appears at the top of the message and is displayed in bold. It is a required field and must be unique.
Text
The text appears in the message below the title and is optional.

Interruption Level
Interruption level is divided into four types.
- Critical: Critical notifications always play a sound and appear on the lock screen even if your device is silenced or in “Do Not Disturb” mode.
- Time Sensitive: Time-sensitive notifications are important messages and are delivered even when a focus mode or notification summary is active. However, unlike critical notifications, they do not play a sound when the device is silenced.
- Active: Active notifications make a sound, and the screen lights up. However, they consider focus modes, notification summaries, and “Do Not Disturb.” For most cases, this option is likely the right choice.
- Passive: Passive notifications are delivered silently. They do not make a sound, and the screen remains dark.
Behavior
Behavior determines how a notification should be handled when it is sent multiple times.
- Keep All Notifications: With this option, all notifications remain until manually deleted. If you want to see how often a motion sensor triggers, this option is the right choice.
- Keep Latest Notification: With this option, previous messages are deleted when the same message arrives again. Only one instance of the same message is kept. For most cases, this option is likely the right choice.

Actions
You can also add actions to notifications that will be offered to you with the notification. There are primary actions and secondary actions. The primary action is executed when you tap on the notification, while secondary actions are offered when you long-press the notification. You can set the primary action by activating the star on the rightmost action. The following actions can be added:
- Execute Scene: This action will run the configured Apple Home scene.
- Execute Workflow: You can specify a workflow from Controller for HomeKit to run.
- Open View: This allows you to open a view from Controller for HomeKit, such as a smart folder, a camera, or a room.
- Snooze: This allows you to remove the notification and deliver it again after a definable duration.

Options for Delayed Notifications
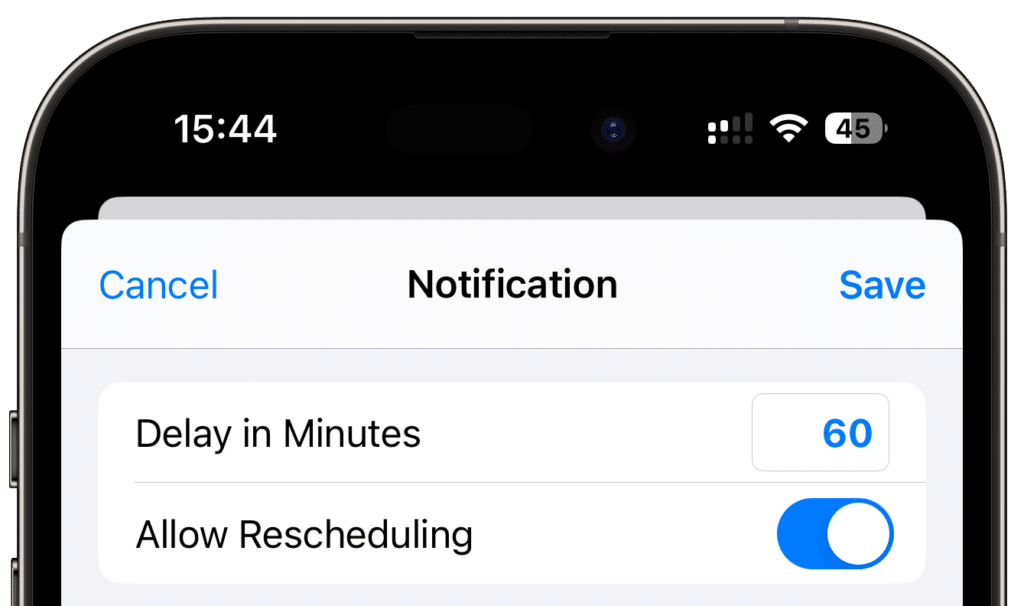
Delayed notifications are sent after a definable duration. Accordingly, there are two additional options:
- Delay in Minutes: The duration by which a notification should be delayed. If the “Cancel Notification” URL is called during this time, the message will not be sent.
- Allow Rescheduling: If this switch is active, and the “Schedule Notification” URL is called multiple times, the delay is repeatedly reset. If the switch is deactivated, the delay continues even with multiple calls to the URL. In this case, the repeated call has no effect.
Options for Scheduled Notifications
Scheduled notifications are sent at a specific time. The following options are available:
- Time: The time at which the notification will be delivered.
- Day: The day of the week when the notification will be delivered. You can select a single day or all days of the week.
- Timezone: Here, you can adjust the timezone. In most cases, you will want to keep the default setting that matches your timezone.

Options for Counter Notifications
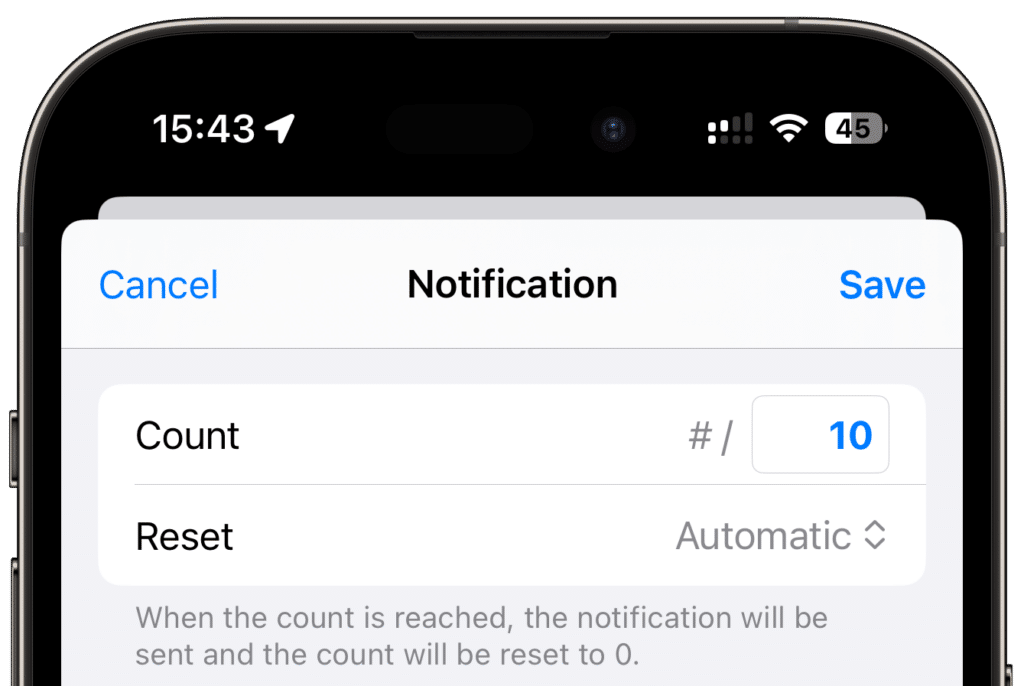
Counter notifications are sent only when the URL has been called X times. The following options are available:
- Count: The count value specifies how many times the URL must be called for the notification to be sent.
- Reset: By default, the counter is automatically reset when the target value is reached and the notification is sent, or the corresponding URL for resetting is called. However, if you want the counter to be reset manually only through the URL and not automatically, you can select “Manual” here. Note that the notification is sent when the counter reaches the target value and every time the URL is called again.
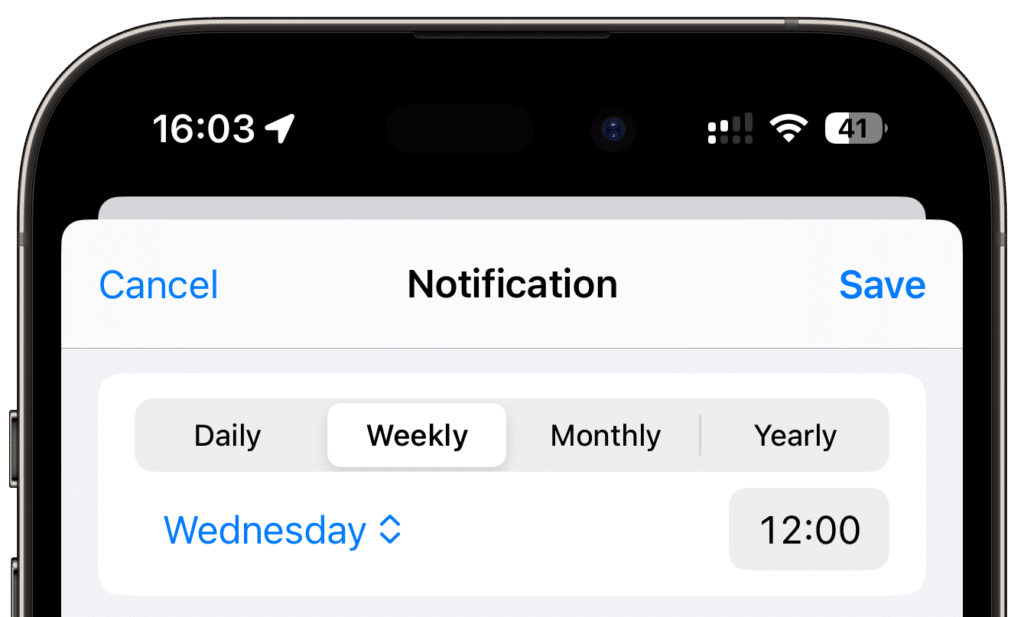
Options for Recurring Notifications
Recurring notifications are the best way to receive reminders for regular tasks, such as creating a backup.
- Interval for Recurrence: Each interval can be daily, weekly, monthly, or yearly. You can add multiple recurrence intervals.
Options for Location-Based Notifications
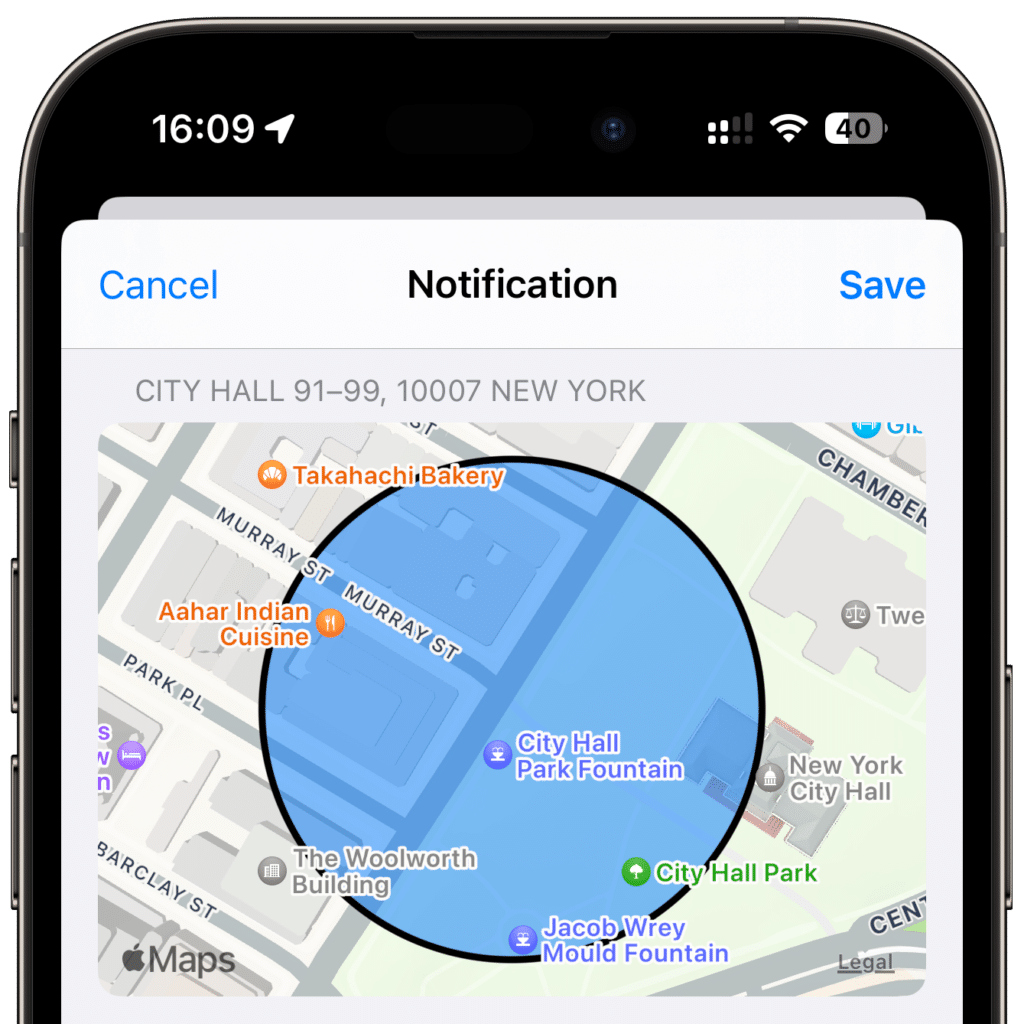
Location-based notifications are executed and sent locally on the device when you arrive at or leave a location.
- Location: A location can be selected through an address, coordinates, or freely on the map. You can also specify whether the notification should be sent when entering, leaving, or both entering and leaving the location.
Send to (only for server notifications)
Here, you can select all devices that should receive the notification. You will see all your devices where you have installed Controller for HomeKit and set up notifications. Additionally, devices shared with you and to which you have permission to send notifications will appear here. To share notifications, open the “Devices & Secrets” section under “Notifications” and share the QR code or link with family and friends (see “Sharing Notifications with Other Users”).

URL Triggers (only for server notifications)
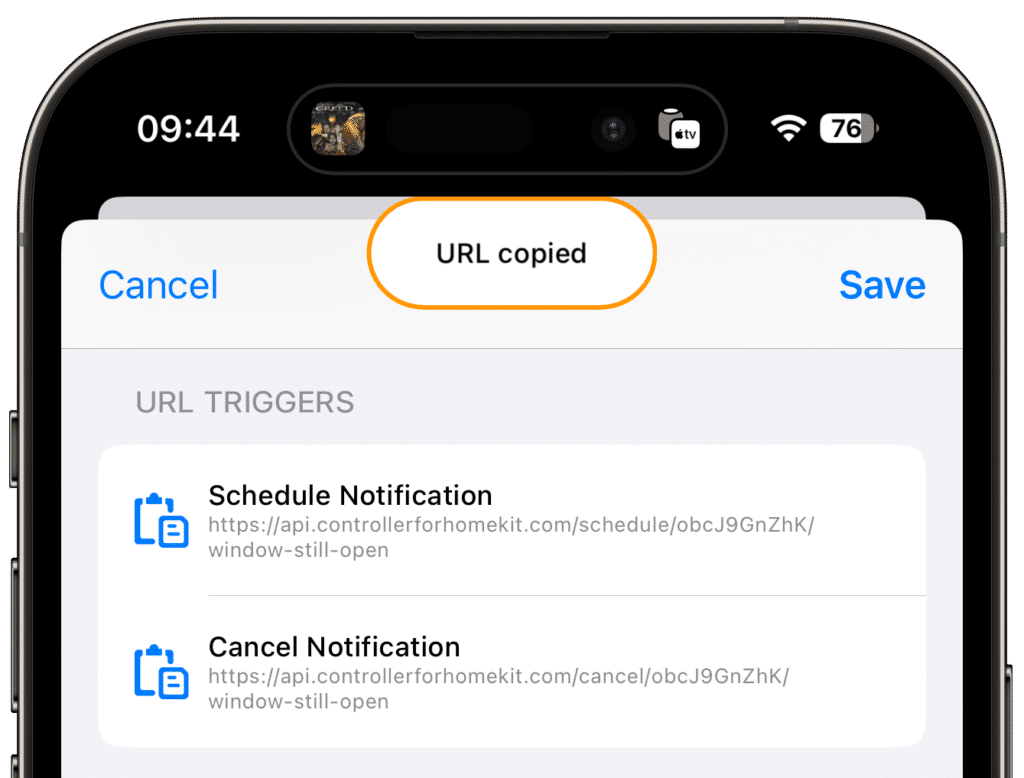
When one of the URLs listed there is called, the notification is sent, scheduled, canceled, or the counter is incremented or reset, depending on the type of notification you have chosen. You can use the URL, for example, in automations (see “Integrating in Apple Home Automations”).

Integrating in Apple Home Automations
Unfortunately, URLs can only be called in automations that have been converted into shortcuts. This feature is not available to developers of HomeKit apps, so the actual automation must be created through Apple’s Home app.
To demonstrate how to send a notification through an automation, let’s look at an example where a notification should be sent when the window has been open for more than 30 minutes.

First, copy the “Trigger Notification” URL from Controller for HomeKit by tapping on it.
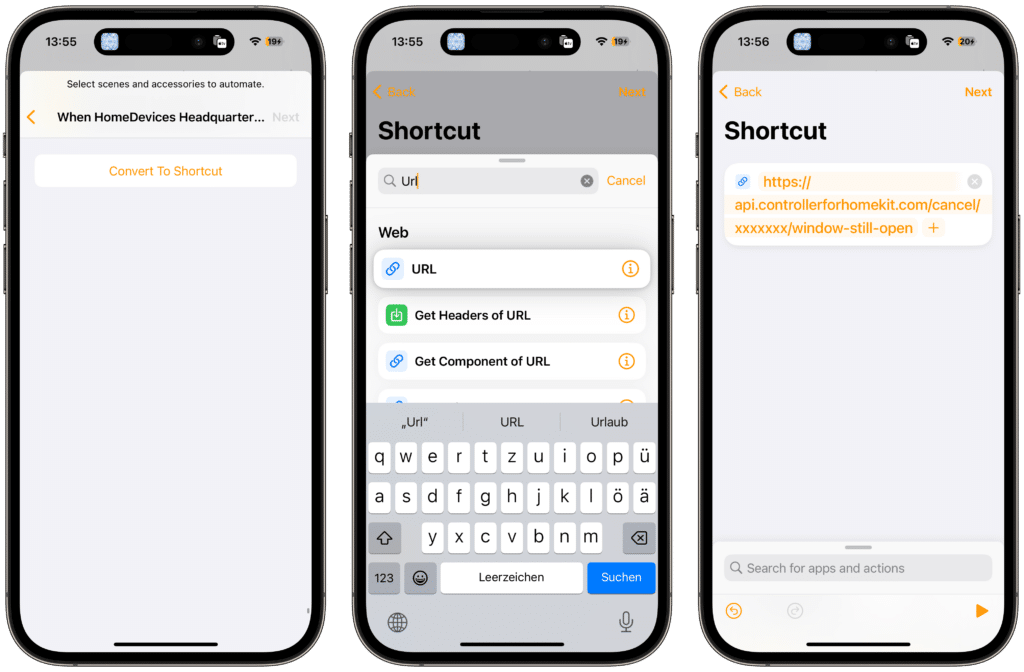
Next, go to the Apple Home app and create a new automation. Use “A Sensor Detects Something” as the trigger and select the relevant contact sensor, specifically when it is opened.

Instead of selecting scenes or accessories, go to “Convert to Shortcut” at the bottom.
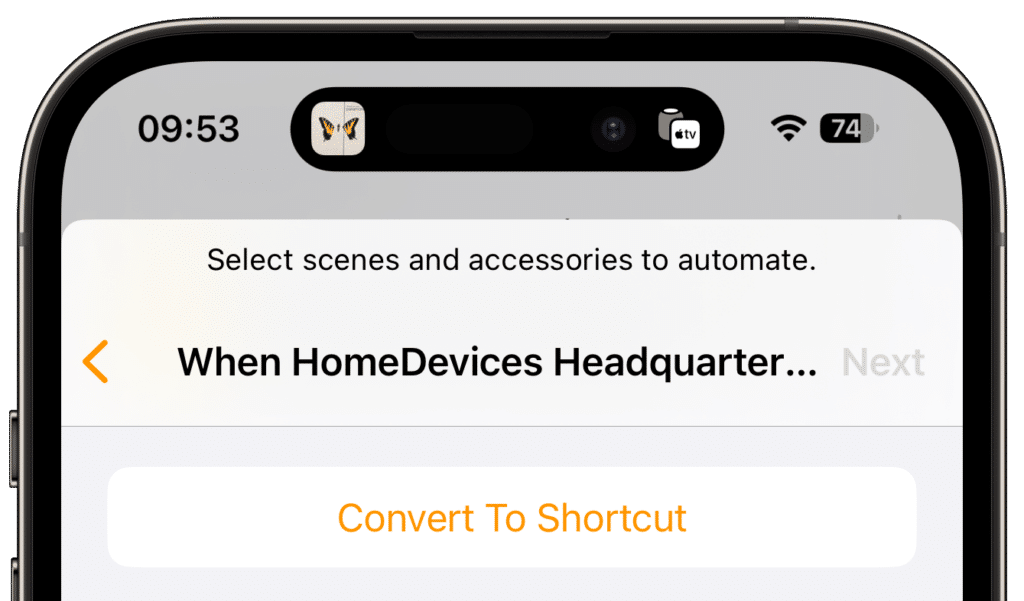
You can delete the empty action and add the URL as a new action instead. Here, you enter the URL that you copied earlier.

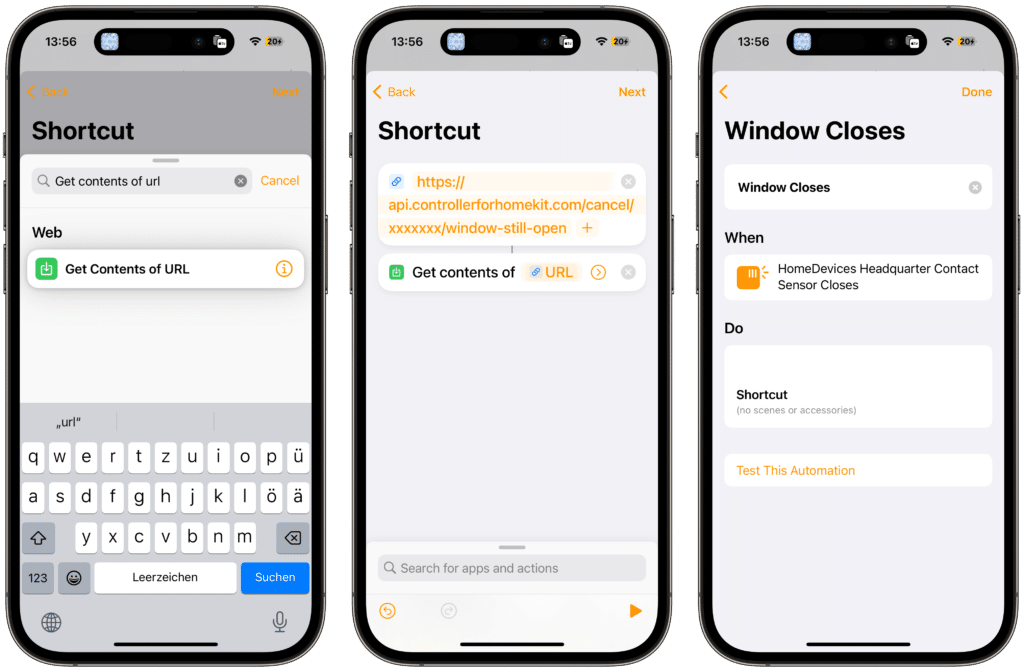
Afterward, the URL just needs to be called using the “Get Contents of URL” action. The URL is already stored after adding the action. Create and activate the automation with “Next” and “Done.”

To ensure that the notification is only sent if the window is still open after 30 minutes and not if the window has been closed in the meantime, you need to create another automation. In this case, use “A Sensor Detects Something” as the trigger again, but this time, use it when the contact sensor is closed.

Then, convert the automation into a shortcut again, delete the empty action, and add the URL as a new action. Here, you enter the “Cancel Notification” URL from Controller for HomeKit.
The last step is to call the URL.
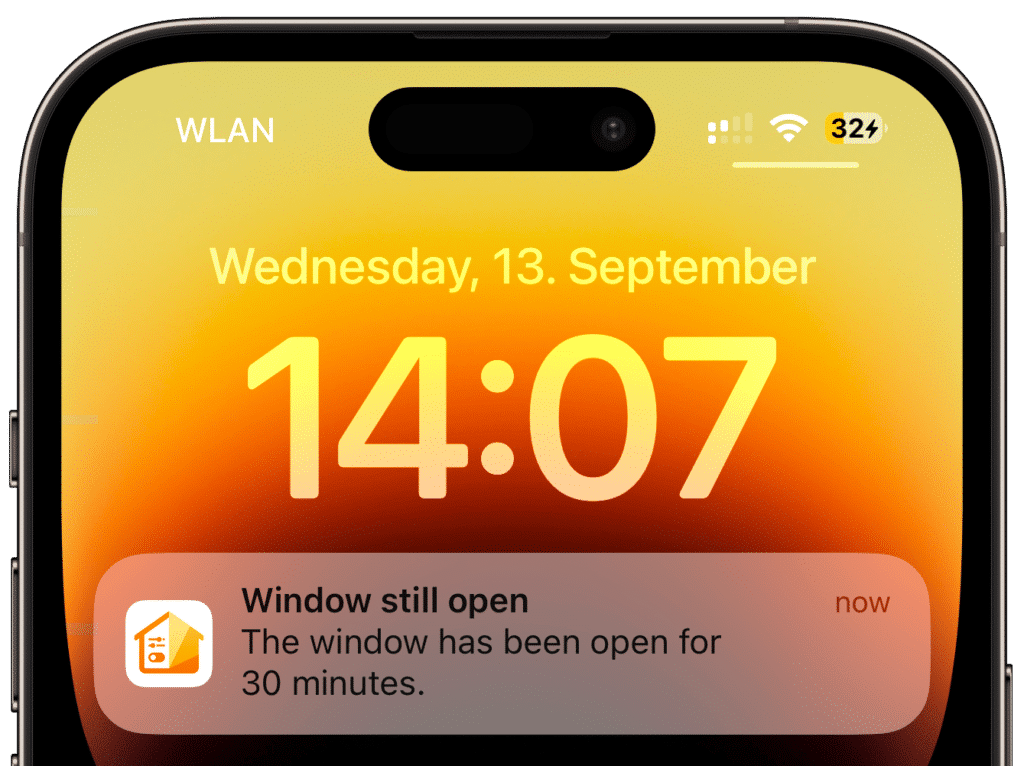
That’s it. If the window remains open for more than 30 minutes, a notification will be sent.
Note: If you want to integrate your custom notifications into more complex automations, you can first create the automation using the Apple Home app with a start event, convert it into a shortcut, and send the notification. Then, you can go to Controller for HomeKit and add additional start events and conditions.
Sending Values from Apple Home
If you want to integrate current values from Apple Home into your notifications, you can do so easily. In your automation, you can expand the “Get Contents of URL” action, change the “Method” to “Post,” and add two text fields for “title” and “text” under “Request Body”. These fields will override the title and text of the notification, allowing you to insert values from Apple Home.

Sharing Notifications with Other Users
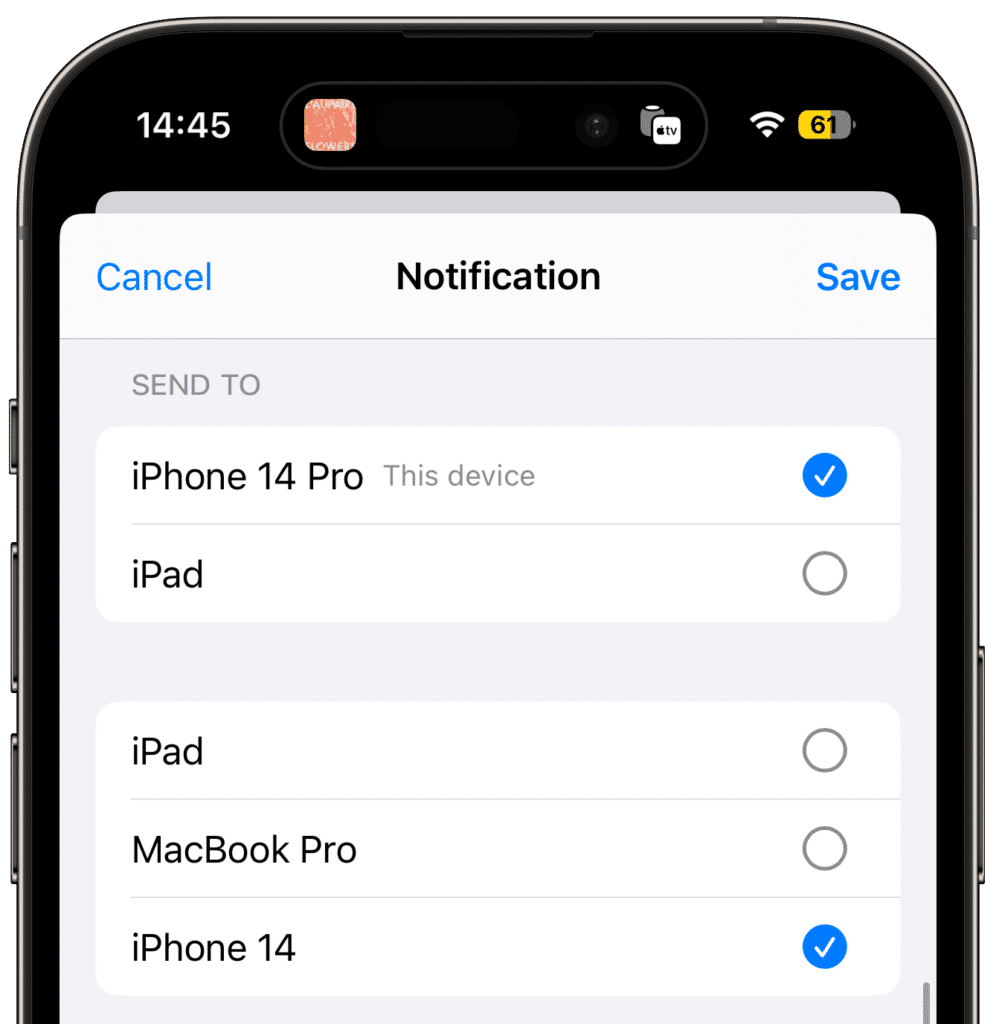
Often, notifications are not only of interest to one person but to all residents. To avoid each person having to create the notification, they can be shared, regardless of Apple’s Family Sharing.
In Controller for HomeKit, you can find “Devices & Secret” under “Notifications”. There, you can either directly scan the QR code or share a link to send a request.

If the request is accepted, the devices will appear under your own devices and can be added to any notification. The connection can be disconnected at any time.
Examples
Notifications can be used in a variety of automations. Here are some examples:
Important Notifications
- High humidity and closed window in the bathroom!
- The living room temperature is over 23°C, and the heating is on!
- You’ve left the house, and some lights are still on!
Observing State & Time
- The bathroom window has been open for more than an hour!
- Motion detected in the backyard (3 times in 10 minutes). Tap to view the camera.
Usage Dependant
- You’ve slept in your bed 15 times. It’s time to change the sheets!
- The coffee machine has been used more than 30 times since the last cleaning!
Human Tasks
- Irrigation has been active for 15 minutes. Move the sprinkler!
Informational
- The swimming pool now has a temperature of 22°C.
- Motion sensor battery under 5%!
- Cleaning of the first floor completed.
- Laundry is finished.
Simple Reminders
- This is your monthly backup reminder!
- Remember to water your plants!
Troubleshooting
- Your automation was just executed!
- The device’s state has not changed in the last 24 hours.


Leave a Reply