


After exploring the basics and general structure of an automation in Apple Home, let’s dive in and create the first automation. For this, we’ve chosen a simple automation: turning a lamp on and off using a programmable switch.

Automations
- Events
Switch Single Press - Conditions
Lamp is off - Actions
Turn on the lamp
- Events
Switch Single Press - Conditions
Lamp is on - Actions
Turn off the lamp
Note: In Apple Home, you can set up an automation directly in the device settings for the single, double, and long presses of the switch. Unfortunately, only one automation can be assigned per button press. Since we need two automations to both turn the light on and off, we create the automation using Controller for HomeKit.
Turn on the light
- Events
Switch Single Press - Conditions
Lamp is off - Actions
Turn on the lamp
First of all, we want to switch on the light if it is currently switched off. To turn the light on when it’s currently off, we create a new automation in Controller for HomeKit by adding a new automation on the home screen using the plus sign in the upper right corner.

Events
- Events
Switch Single Press - Conditions
Lamp is off - Actions
Turn on the lamp
First, we select the trigger. Since the light is to be controlled via a switch, we tap on “Remote”, choose the switch, and then “Single Press.”

Next, a summary of the automation is displayed, and there’s an option to set a name at the top. To keep things organized, it’s advisable to choose a meaningful name. In this case, we’ve chosen “Office Turn Light On”. Optionally, you can add a suitable icon.

Conditions
- Events
Switch Single Press - Conditions
Lamp is off - Actions
Turn on the lamp
Since our automation should only run when the light is currently off, we need to add a corresponding condition. In Controller for HomeKit, this is done through the “And the following conditions are met” button.

There, we choose “Accessory,” select the room where the lamp is located, choose the lamp, and then select “Power State” with the comparison operator “equal to” and the state “Off.” Tapping “Save” adds the condition to our automation.

Note: If you want to control multiple lamps through the same switch, you can add each lamp as a condition. Afterward, you can set the switch that appears in multiple conditions to “All”. If any of the lamps is already on, the automation will not be executed. Instead, in the next automation in this case, we turn off all lamps.

Actions
- Events
Switch Single Press - Conditions
Lamp is off - Actions
Turn on the lamp
Now, the only thing left is the actual action, in our case, turning on the lamp. To do this, we go to “Then execute these scenes” and add a new scene via the plus sign. We name it “Office Turn Lights On.”

As actions, we add all lamps that should be turned on. Depending on the type of lamp, you can add different characteristics. In any case, “Power State” should be included. You add characteristics to the scene by clicking on the circle next to the feature. Set the value in front of this feature to the desired state—in our case, the switch should be on.

For colored lamps, you can also set the color, brightness, and color temperature. Any characteristic that should be set to a specific value when pressing the switch should be added to the scene.
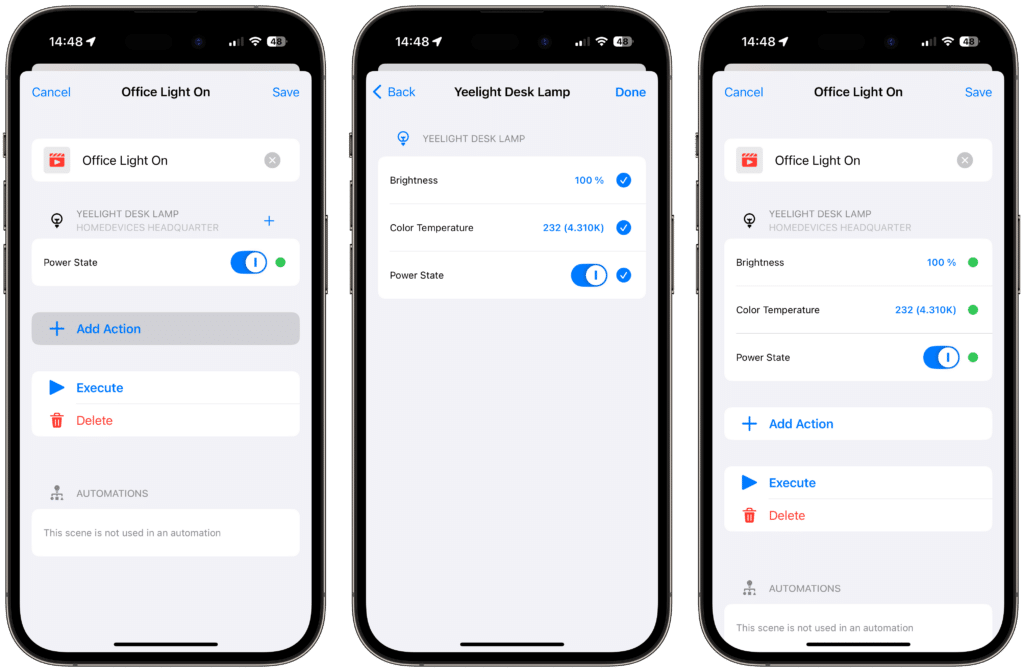
To test if your scene works, you can go to “Execute” in the overview. Tapping “Save” creates the scene. Then, you need to select the scene in the list and close the list in the upper left.

Now you just have to activate the automation by turning on the “Enable Automation” switch at the bottom. Tapping “Save” creates the automation. With this, you can already turn on the light using the switch if it’s currently off.

Turn off the light
- Events
Switch Single Press - Conditions
Lamp is on - Actions
Turn off the lamp
Once we press the switch, the lamp is already turned on. To turn the lamp off again with another button press, we need to create another automation.
Events
- Events
Switch Single Press - Conditions
Lamp is on - Actions
Turn off the lamp
As a trigger, the starting point of our automation, we again tap on “Remote”, select the switch, and then “Single Press.”
The trigger remains the same for our automations. The distinction of which automation is ultimately executed is solely determined by the specified conditions.
We name this “Office Turn Light Off.”

Conditions
- Events
Switch Single Press - Conditions
Lamp is on - Actions
Turn off the lamp
If, in our first automation, we added the condition “Lamp is turned off,” in this case, we link the condition to the fact that the lamp is turned on.

We tap on “And the following conditions are met,” choose “Device,” select the room where our lamp is located, choose the lamp, and set the condition “Power State” to “equal to” and the state to “On”. By tapping “Save,” this condition is added to our automation.

Note: If you want to control multiple lamps through the same switch, you can add each lamp as a condition. Afterward, you can change the switch that appears in multiple conditions from “All” to “Any”. If any of the lamps is turned on, the automation will be executed, and the lamps will be turned off.
Actions
- Events
Switch Single Press - Conditions
Lamp is on - Actions
Turn off the lamp
The last step is to add the actions that should be executed once the switch is pressed, and the lamp is already turned on. To do this, we tap on “Then execute these scenes” and add a new scene via the plus symbol. We name this scene “Office Light Off”.

This time, we only set the “Power State” of all our lamps that should be turned off to “Off”.

To check if the scene works properly, you can once again tap on “Execute” in the overview. After testing the scene, save it by tapping “Save”. Then, select the scene in the list and close the list in the upper left.

Finally, activate the automation by turning on the “Enable Automation” switch at the bottom. By tapping “Save,” the automation is activated.

This allows you to turn the light on and off with the same switch.


Leave a Reply