


Anyone who ventilates in winter surely knows the annoying feeling of unintentionally leaving the window open after airing. This is not only frustrating but also hits your wallet. Through Apple Home, two small automations can provide a solution.
Difficulty Level

Required Accessories
Used Apps
Automations
- Events
Contact Sensor Open - Conditions
– - Actions
Turn Off Heating
- Events
Contact Sensor Closed - Conditions
All Contact Sensors Closed - Actions
Turn On Heating
Turn Off Heating
When a window is opened, the heating should be turned off. To achieve this, we create a new automation in Controller for HomeKit using the plus sign in the top-right corner.

Events
- Events
Contact Sensor Open - Conditions
– - Actions
Turn Off Heating
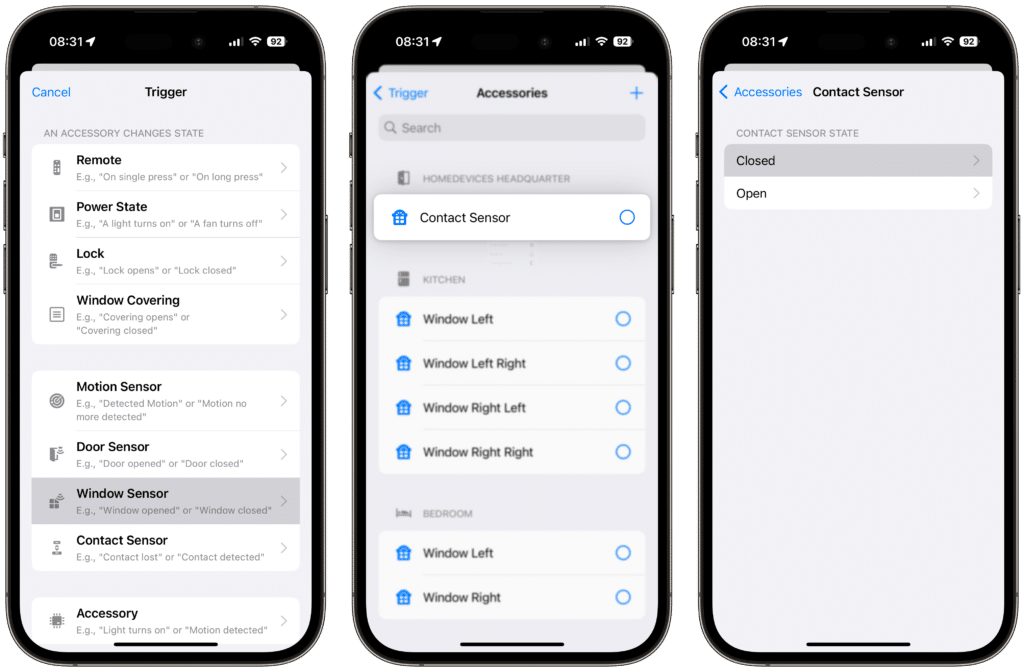
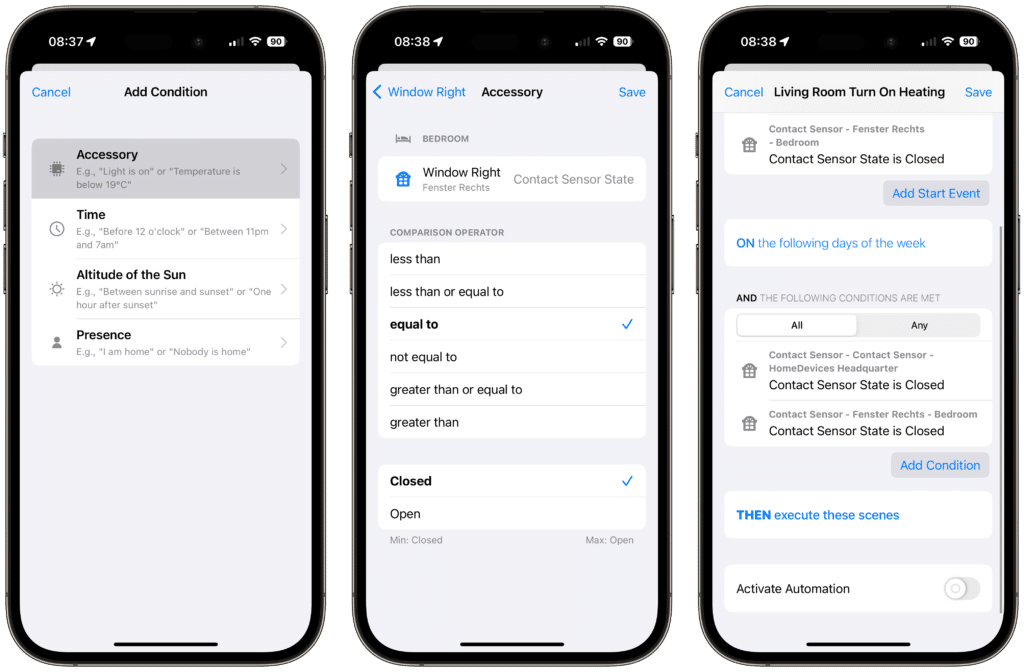
Choose “Window Sensor” as the trigger and then select the corresponding accessory. If the sensor is not displayed under “Window Sensor”, check under “Contact Sensor”. In that case, you haven’t classified the contact sensor as a window sensor. Next, choose “Open” under “Contact Sensor State”.

If there are multiple windows in the room, you can select additional window sensors by using the “Add Start Event” button.

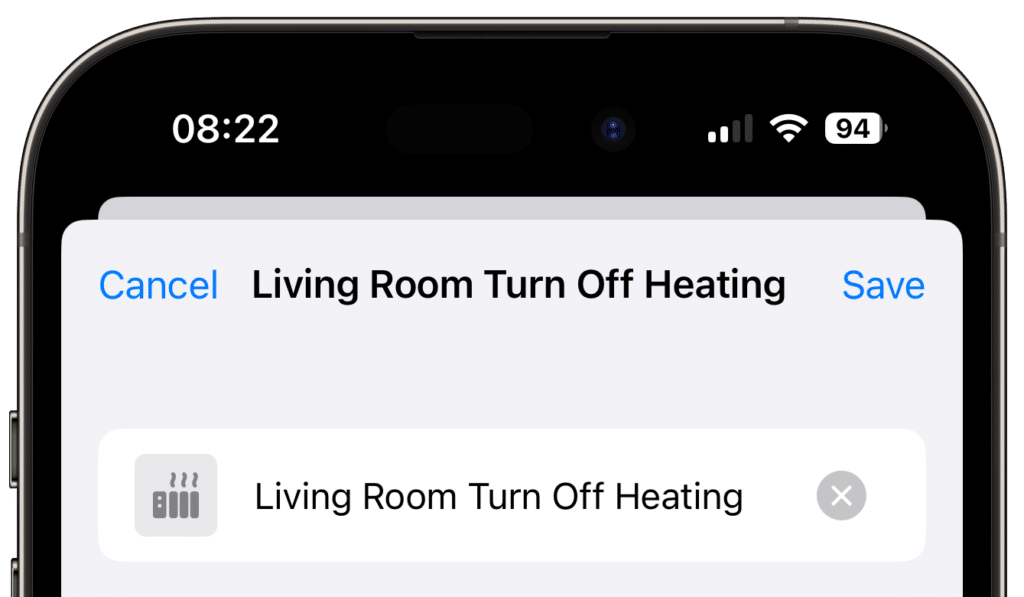
For better clarity, it is advisable to assign a suitable name to the automation. We have chosen “Living Room Turn Off Heating”.
Conditions
- Events
Contact Sensor Open - Conditions
– - Actions
Turn Off Heating
No conditions are required for this automation.
Actions
- Events
Contact Sensor Open - Conditions
– - Actions
Turn Off Heating
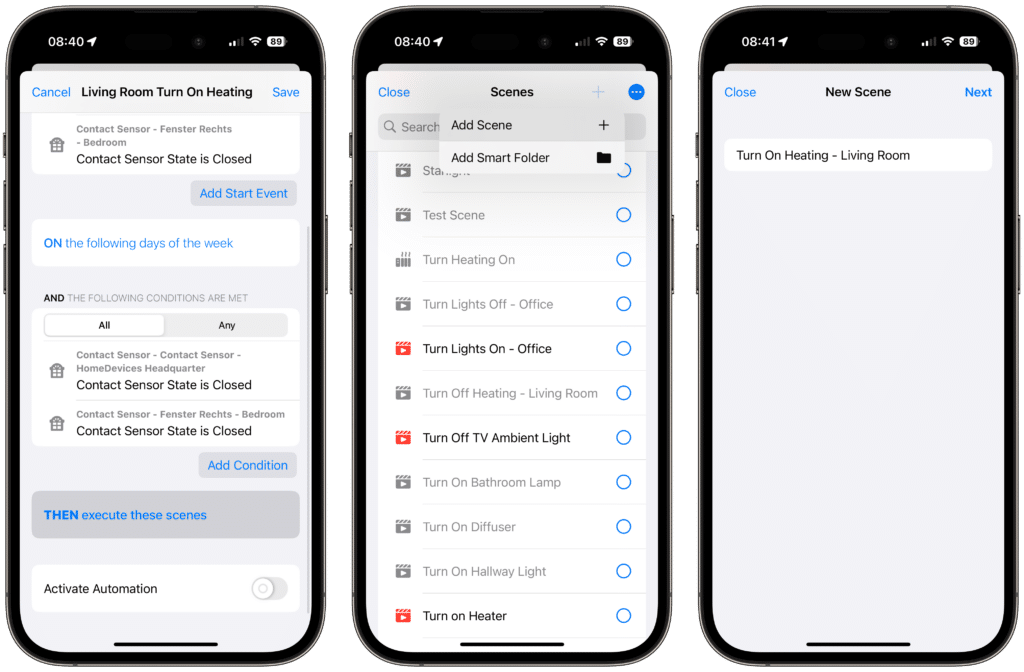
Now, the heating just needs to be turned off. Through “Then execute these scenes”, a scene can be set up. If you don’t have a scene that turns off your heating, you can add a new one using the plus sign in the top-right corner. Assign a suitable name, such as “Turn off Heating – Living Room”.
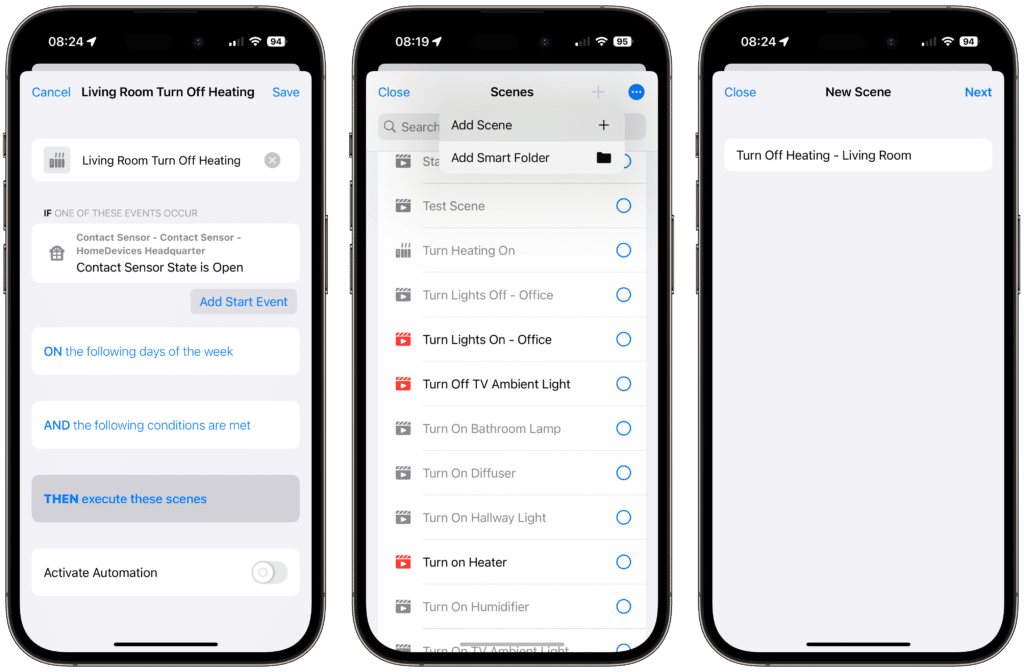
Subsequently, we add an action, select the heating thermostat, and set the target status to “Off.”
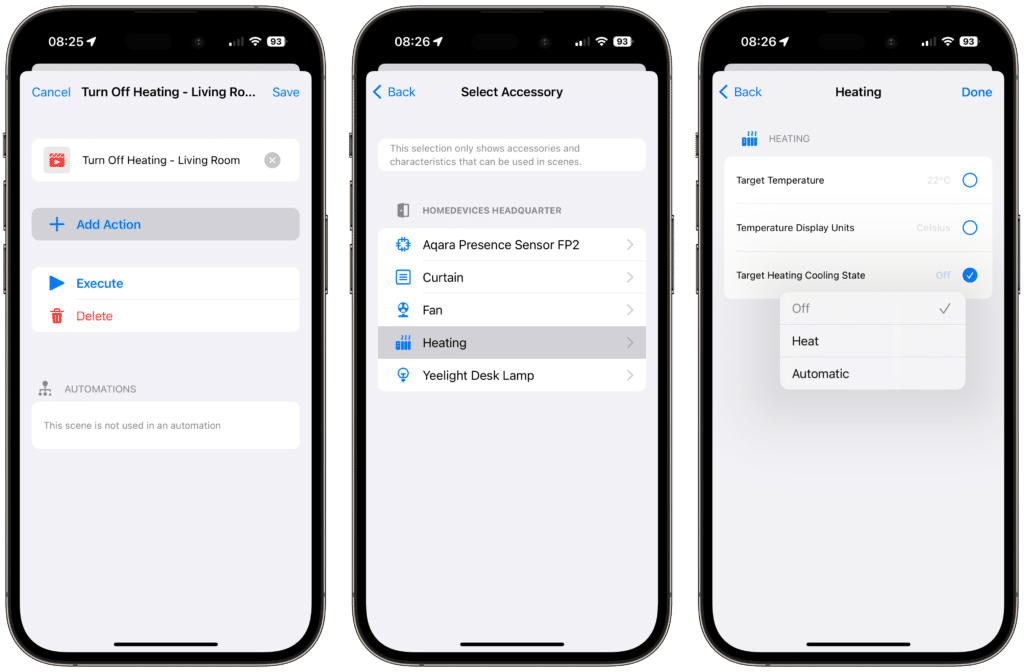
If you have multiple heating thermostats in the room, you can repeat the process for each accessory. Now we save the scene and select it from the list. After that, the automation just needs to be activated and saved.

Turn On Heating
To ensure the heating is turned back on when the window is closed, another automation needs to be added.
Events
- Events
Contact Sensor Closed - Conditions
All Contact Sensors Closed - Actions
Turn On Heating
Use the “Window Sensor” as the trigger, but this time, when the window is closed.
If you have multiple windows in the room, you can also use them as triggers for the automation by selecting them through the “Add Start Event” button.

Assign a descriptive name to this automation as well.

Conditions
- Events
Contact Sensor Closed - Conditions
All Contact Sensors Closed - Actions
Turn On Heating
Note: If you are using only one contact sensor for the automation, you can skip this step.
As the heating should only be turned back on when all windows are closed, we need to add conditions.
To do this, we tap on “AND the following conditions are met”, then on “Accessory” and select the first contact sensor. We add the “Sensor Status” with the comparison operator “equal” and the value “Closed”.

For each contact sensor you added as a trigger, you need to repeat this step. Keep the switch for conditions set to “All”. This ensures that all conditions must be met, meaning all windows must be closed for the automation to execute.
Actions
- Events
Contact Sensor Closed - Conditions
All Contact Sensors Closed - Actions
Turn On Heating
Now, only the scene to turn the heating back on is missing. To set this up, we go to “THEN execute these scenes” and add a new scene using the plus sign in the top-right corner. If you already have a scene that turns on the heating, you can simply select it from the list. Otherwise, you should give the new scene a suitable name, such as “Turn On Heating – Living Room”.
Next, we add a new action, select the heating thermostat, and set the target status to “Automatic” or “Heating,” depending on your default status.

If there are multiple heating thermostats in the room, repeat this process for each accessory. Then, save the created scene and select it from the list. Finally, the automation just needs to be activated and saved.

Note: If you turn off the heating at the end of the heating season, you can deactivate the automations. Learn how to temporarily archive scenes and automations in this guide.


Leave a Reply